Texas Hold ‘Em
Finally soldered up one of the secondary driver boards. Lots of little connections to make, but I’ve gotten good enough with the iron that it went pretty quickly. Got things hooked together this morning to give it a test, and it actually went pretty well. Not perfectly, though, which is somewhat concerning. The LEDs on the secondary boards lit appropriately, but sometimes, randomly, came back on during phases they should have remained off. There are a couple of possibilities that I can think of here. Both of them end up coming down to the same thing: Something is a little bit off on the reference voltage and the signal voltage passing between the chips.
I don’t have this issue on the single chip on the timing board, which is driven by the Netduino directly, but once it cascades from one chip to the next, and goes to a board driven by my voltage regulator chips, it starts acting up. So, could be the chips aren’t outputting quite as much voltage as they should, or the power supply isn’t quite as steady as it needs to be. My bet is on the latter, since these chips are used by who knows how many people for how many applications worldwide. They wouldn’t just not work as designed. I haven’t included any capacitors in my power circuit yet, so I’m hoping that adding those will help out.
Of course, the second possibility is that the instability is just being caused by the fact that I have things in a sort of temporary test rig setup. If I were to go ahead and finish the soldering, make proper connections between the boards, and hook up the board itself, maybe it’d all just work. But if it didn’t, how deep in a hole would I be for solving the problem at that point? Am I really ready to go all in on this? Or do I get some caps on order and retest first?
By the Power of Grayskull
Not a whole lot of progress recently, as it’s difficult to find time to work on the project with other various life things going on, but a little more forward movement today. I knew from reading up that it was likely the Netduino wouldn’t be able to power all the LED driver chips by itself; the LEDs would end up drawing more current than the Netduino is designed to supply. So, I ended up getting some voltage regulation chips. Spent a little time today building up a PCB to hold those chips, soldered it together, and was pleasantly surprised when I was able to sub that into my current setup and run the timing/LED driver PCB on power from that board rather than from the Netduino. No reason it shouldn’t have worked, but I’m trained to expect things not to behave as I want on the first try. It’s nice to be surprised once in a while.
Now I just have to wait to see how it turns out this was actually a failure, when something bites me down the road.
Fix-It Felix, Jr.
Finally got around to troubleshooting the timing circuit, and it looks like it’s up and running successfully now. Hooray! Turned out there were two problems: in the schematic, I had accidentally swapped a connection of the grayscale clock and the serial clock; and I had left the latch pin disconnected somehow. I’ll need to go double-check the other board now to make sure these same errors didn’t occur there, but even if they did, I can fix it with extra wires if needed. Regardless, it’s heartening to finally have this part of the project back under control.
Next steps could involve any of: Trying to connect this to the board itself, working on the control software, or wiring up the secondary boards. No idea which I want to tackle first.
Philosopher World
Well, I finally made the time to solder up one of the boards I ordered and, not too surprisingly, it didn’t work off the bat. I noticed a flaw in the schematic as I was looking to see how everything should be wired up, and was able to fix that, but the overall fact remains that even with the fix, the board didn’t do its job. So now, I have the long troubleshooting process to look forward to. This will probably tell the tale of whether I actually finish this project. This is the kind of setback that can really sap the desire to move forward, because you feel like you’re so close to a breakthrough, but suddenly get a roadblock set before you that may take weeks to clear. It’s not like I’ve had a lot of time to devote to the project at all lately, so it’ll be interesting to see whether I can manage to solder on. (See what I did there?)
Ethereality
Got the PCBs in, but before playing with those, I finally had a chance to test some of the wireless communication bits. Seemed like the XBees were set up to be as easy to use as possible, and that’s the experience I ended up having. Did a little bit of digging to confirm what chunks of code I needed, but pretty quickly got it up and running.
The Netduino that I’ve been using all this time is still running the LED driver, and now has a countdown cycle that I can trigger with the on-board button which lights a number of LEDs, then turns one off each 1/4 second. I then added an XBee Series 1 to it using an Arduino shield, and put in a bit of code to also trigger the countdown cycle any time the XBee receives data.
That meant it was time to break out the Netduino Plus, hook up an XBee, and have it transmit a single character when its on-board button is pressed. At first I worried it hadn’t worked, because it didn’t seem to respond to my first button press, but later presses worked exactly as desired. Press button on one board, watch LEDs controlled by other board light up then die down. Pretty dang cool.
Side note here is that this is the first time I’ve run the LED board off battery power. Got a lot of flicker on them in this configuration, unfortunately. That being said, it’s working on 4 AA cells, whereas the final is probably going to be running 4 D cells. Hopefully that difference will help even out the power and make things shinier. If not, I’ll have to spend more time figuring out the power solution than I’d hoped.
A Waity Conversation
Well, waiting on the PCBs to come in. Should be in by the time I get back from a trip over the next several days, so hopefully I can try playing with some things. I’ve also ordered up a few more components in an audacious plan I’ve come up with. After looking into the wireless stuff more, I think that’s the way I want to go, so I now have some tiny transmitters and receivers, along with another microcontroller board. I ended up getting a Netduino Plus for this half of the project since it already has an SD card slot built in. I got a cheap SD card shield for use otherwise, but I don’t want to add too many external components to the system, as that uses up valuable I/O pins. I’m optimistic that this will work out pretty well, but I’m also back into an area that I haven’t planned out quite as well as the previous bit. I may need to spend some time sitting down again and planning things out a little more firmly.
Bah, planning. Who needs that anyway?
I Don’t Want to Go on the Cart!
Things have been a little slow of late, but finally making a tiny bit more progress. Finally figured out an issue I was having with the LED driver chips, namely that I was running them on 5V source but giving them 3.3V signals. That caused the serial communication to work sometimes, but not always. After adjusting the source voltage down to the 3.3V rail, it started working properly with multiple chips. Given that, I’ve ordered some PCBs to see how I can do on actually wiring everything up. If this goes well, I’ll have to start looking at the actual board and control housings, and figure out how to connect them. My initial plan was a simple Cat-5 connection, but I’ve started looking at some wireless communication stuff that’s intriguing. It’d be quite nice to not have the controls tethered to the board itself, and would really free the thing up to be set up however works best. Will keep looking into possibilities.
When the Ink Hits the Face, That’s a Board, Eh?
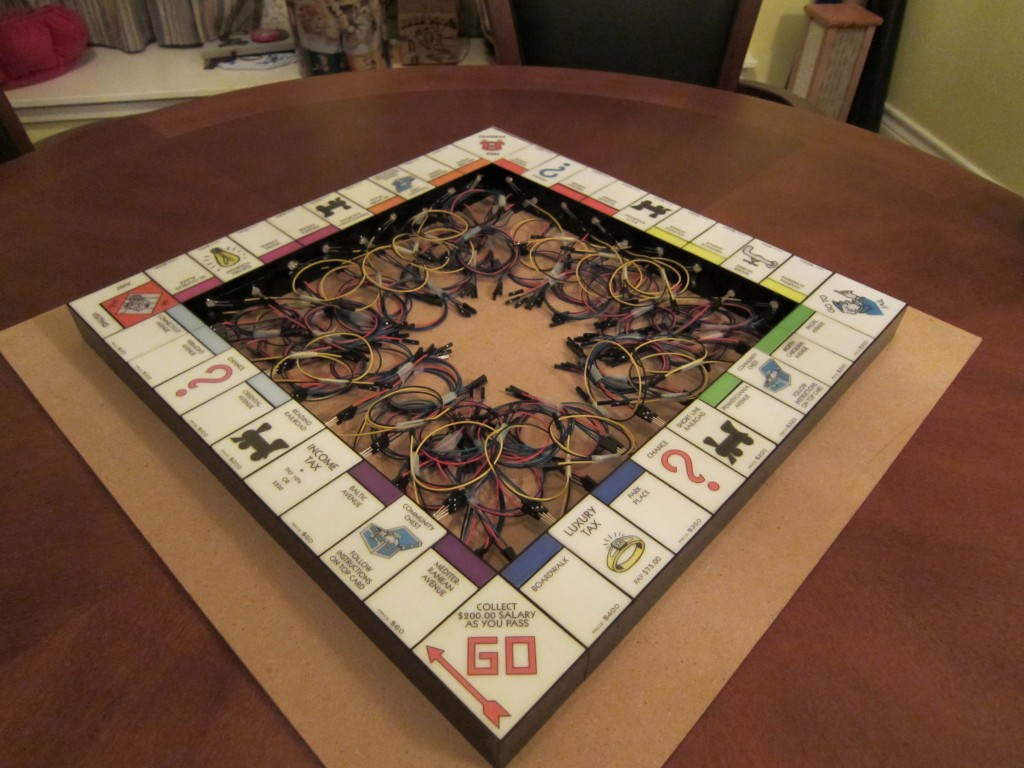
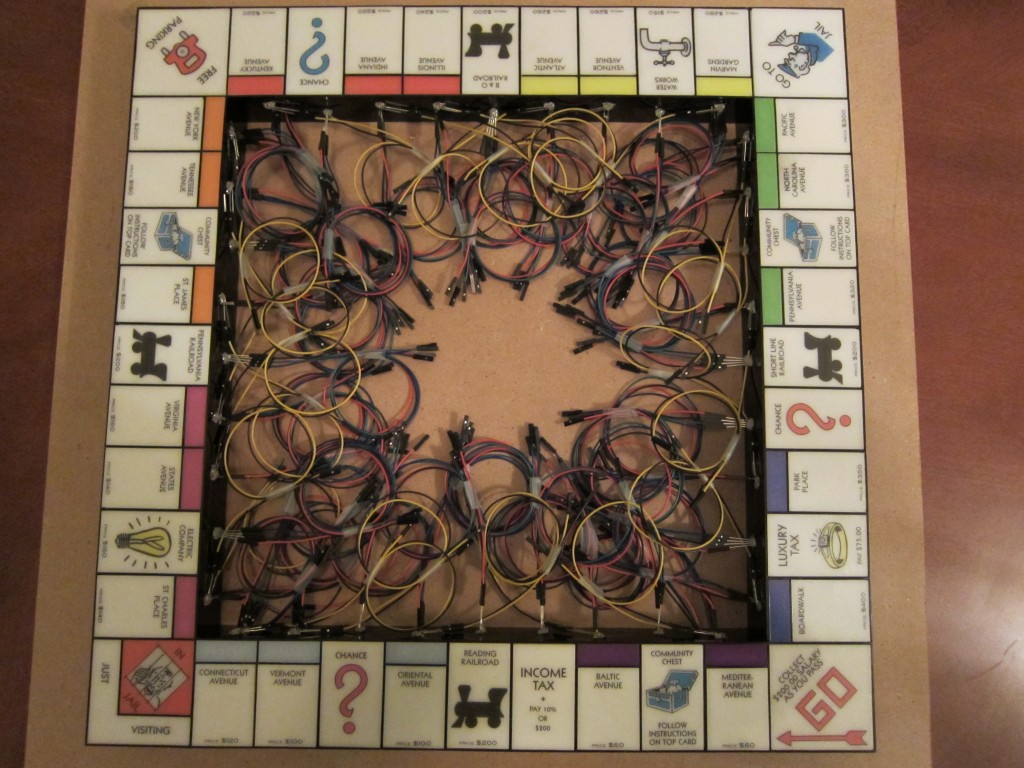
After a couple of false starts with transparencies and water slide decals, I finally found a printable medium that I liked for the board graphics. Following some creative image acquisition, I had appropriate Photoshop files ready to go, and printed out the spaces. Over the last several days, I’ve been applying the decals and dropping things into place, and suddenly, it looks like I’ve got a real board here! Had a couple of setbacks on the electronics front, which I’ll probably detail later (when I get past them), but for now, enjoy some of the first pictures where it becomes very obvious that yes, this really is intended to be a Monopoly board.
A Maze of Twisty Little Wires, All Alike
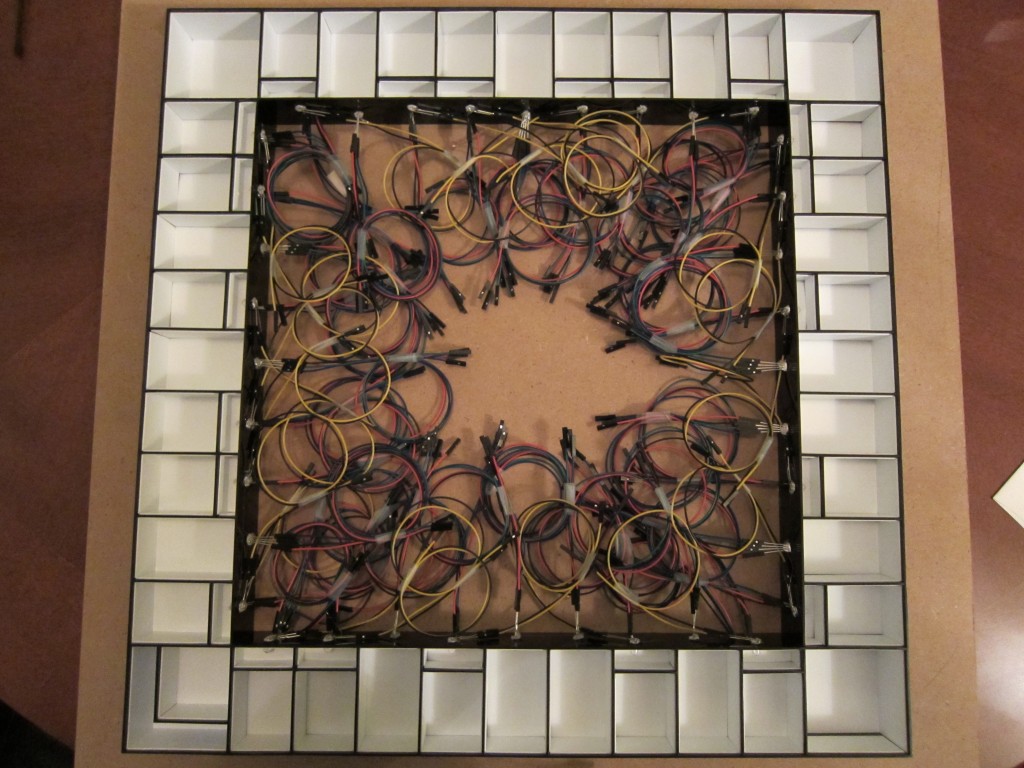
Well, that was a lot of work. After honing my acrylic manipulation skills, I finally had to move on to another aspect of the build. This weekend has been spent installing LEDs in the framework. For each LED, appropriate wires had to be attached first, then the LED attached by hot glue. I considered using an epoxy, but want the LEDs to be removable just in case one goes out. After putting in the initial batch of 26 RGB LEDs, I realized the wire management would quickly get, well, unmanageable. So, I added a step of coiling and taping each LED’s wires together. The whole process took a lot longer than I would have liked, and I haven’t even been able to test all the lights yet. Regardless, good progress. At this point, I may have to actually start working on the electronics again so I might be able to light them all up at once. Once that works, it’s on to test patterns. Starting to shape up!
Falling into Place
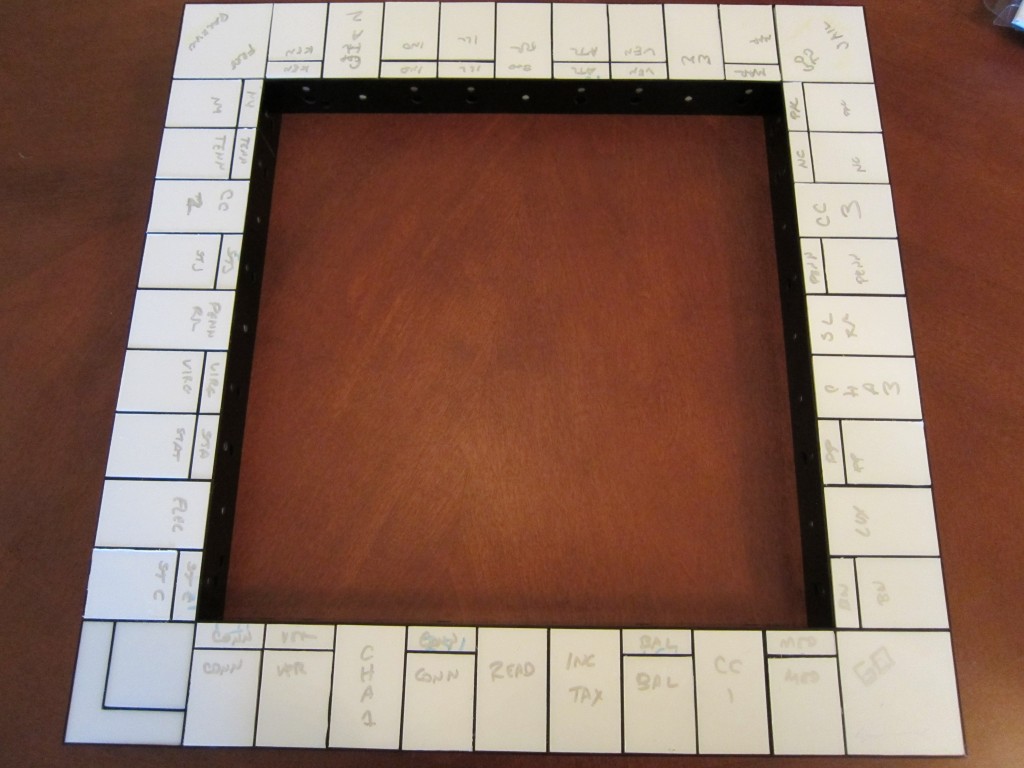
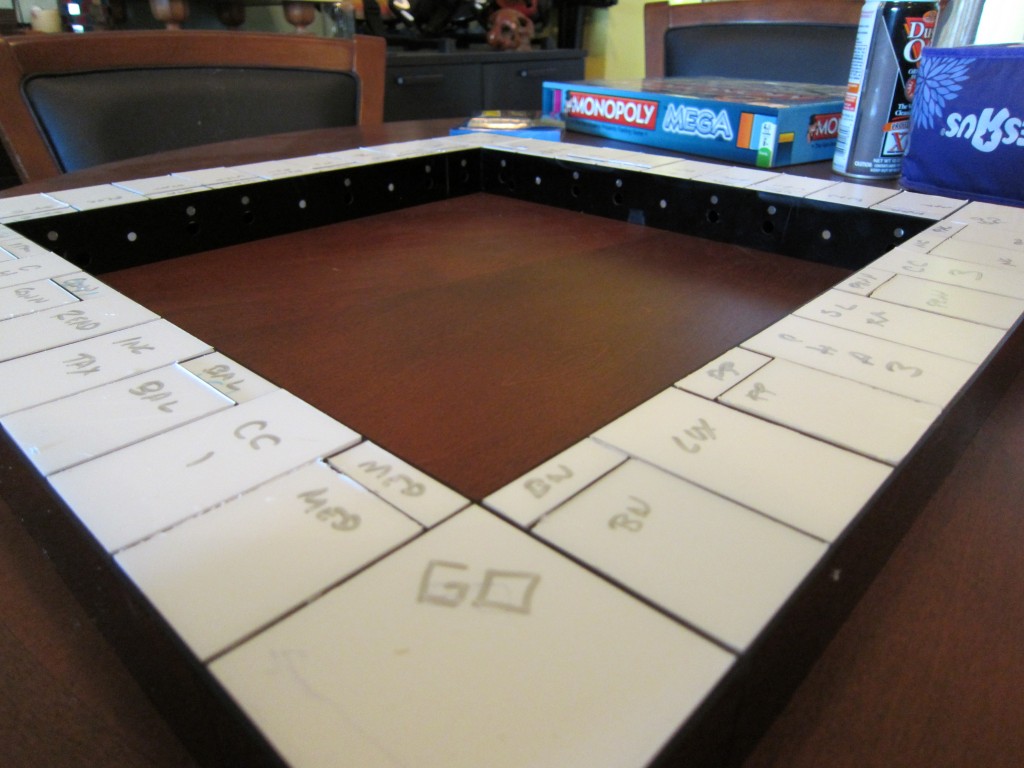
After spending far too long trying to fine-tune the diffuser pieces using sandpaper and files, I finally listened to the reason of posters online and set my routing table up. Using a flush-cutting bit with a bearing, I ended up taping the pieces to a small board, letting just about how much I wanted to remove overlap the edge. Amazing how much easier using the right tools makes a task. After spending a few hours between the board and the router table, I finally have pieces that fit all the spaces reasonably well. I’m sure as I start working with the graphics, I’ll probably find bits that aren’t quite right, and decide to retune some of them, but for now I’m reasonably happy. The board is actually starting to look a little bit like an actual board now, although none of the pretty graphics are in place yet; in fact, most of the protective cover is still there, so it looks a little more ragged than it really is.
Speaking of the graphics, I learned about a new technique and ordered some equipment to try. Waterslide decals. Basically, it’s a soluble paper base with a shiny (maybe adhesive) layer to print on. You then spray a few coats of clear gloss acrylic after printing, cut it to size, soak in water, then place the decal where you want it and slide the paper backing away. Looks promising, and a test run taught me a couple of things about it. Will try again soon, and if all goes as I hope, I’ll have a good looking solution to the graphics task. In the meantime, enjoy this board that’s starting to look like a board.
-
Archives
- November 2012 (2)
- October 2012 (1)
- September 2012 (4)
- July 2012 (2)
- June 2012 (7)
- May 2012 (6)
- April 2012 (5)
-
Categories
-
RSS
Entries RSS
Comments RSS
